How-to

Too much water

on Sun, 04/24/2016 - 22:49

Yesterday I was out working with my plants and noticed that the kale had an usually high number of dead leaves. That was odd since it had been doing so well.

A little while later I went to add a little volunteer kale start that had popped up in another planter. Went to dig a hole for it and found that under the mulch the soil was completely saturated with water. I guess somehow I missed that this planter didn't have any drain holes in it. Seems like this is becoming an issue more and more. It used to be that pots all came with drain holes. Then they came with weak spots where you were supposed to use a hammer or other tool to pop those circles out. Now it seems like most have no way for the water to drain out.

So how do you solve this issue, especially when the planter already has soil and plants in it? A drill. Just put a drill bit into your drill and put as many holes into the pot as you'd like.

For now the pot has three holes on the one end. Later I'll add more.

2016-04-23-17.35a.png   2016-04-23-17.35.png

Organizing Seeds

on Tue, 04/19/2016 - 22:50

Organizing your seeds can be a hard thing for some people. It's fine when you have a few packets, but what do you do when you have dozens? I wasn't sure, so I ended up diving them by type (tomato, squash, herbs, flowers, etc) and putting them in big envelopes. Inside each one is a ziplock for the open packets. I have the type written on the front of each envelope and I keep them in a container I bought at the dollar store. This makes it easy for me to flip through and find what I am looking for.

2016-02-21-09.40.png

I also found this interesting way of doing it on the Frugal Mama & The Sprout blog. It uses a binder and photo pages to organize everything. This allows you to also add layouts of where everything is planted and then have the photo pages after it to hold each of the packets of seeds. I'm thinking of trying this next year.

Seed-Notebook.jpg
Image courtesy of Frugal Mama & The Sprout

On the Montana Homesteader, they use an old photo album to hold everything together, including plans.

Organizing-Garden-Seeds-Montana-Homesteader.jpg

Reformation Acres has a whole bunch of ideas, including tic tac boxes and filing envelopes.

Thrifty Fun has even more ideas, including photo pocket pages and coupon organizers. 

Hot weather

on Mon, 04/18/2016 - 22:54

Many parts of the country are having abnormally high temperatures. That is definitely the case here where I live in Oregon. We're seeing temps in the mid to upper 80s and there's been some talk of us hitting 90 this month. For this part of Oregon, that is just crazy. We should be in the 60s and 70s right now.

For those of us who container garden, that means lots of watering. The plants haven't grown strong enough roots yet to be able to seek out all the water in the pot and the plants aren't strong enough yet to deal with this weather. That means a lot of wilting, shock, and possibly death. So how do you deal with this?

Go out first thing in the morning and give everyone a really good watering. Make sure not to miss anyone. Doing it early in the day before it gets too hot out decreases the amount of water lost due to evaporation and allows it to seep into the dirt.

Put mulch around your plants. Several of my pots have mulch all around the plants. Home Depot has been running a special lately on the weekends where big bags are only $2/each. I bought three, which appears to be way too much for my garden. Having never worked with mulch, I didn't realize that a little goes a long way. And be sure to have gloves as well, otherwise you will end up like me and be covered in slivers. I like working in the garden with my bare hands, but not with mulch! Adding mulch helps to keep moisture in your pots longer, which means they can better make it through these hot days.

Check on your plants during the day. If it's extremely hot outside, you may find some plants need a second watering. Just be careful, as you don't want to overwater and wash all your nutrients away. You can look at the soil and see how dry it looks, is it pulling away from the sides of the pot, etc.

Hopefully all of this will help you to protect your plants during these heat waves.

2016-04-18-15.40.png   2016-04-18-15.37.png

Your friend the ladybug

on Tue, 04/12/2016 - 22:45

If you want to grow a garden that is free of chemicals, beneficial bugs are going to be a lifesaver for you. Without them, you'll end up with bugs all over your garden, killing plants, eating leaves, etc.

One of my favorites to use is the ladybug. They love aphids and can eat up a bunch of them. They'll also eat pollen as well, which means they may pollinate your plants. There's a good source of information about them here.

Ladybugs can be purchased at many feed stores, farm stores, etc. Here I've bought them at Coastal Farm & Ranch as well as Fred Meyer. They tend to come in a mesh bag or plastic cup. They tend to be in hibernation, but will wake up once they warm up. Don't be surprised if some are dead - that's normal. If a lot of them are dead, that's not, but don't be surprised if 10% or so are dead. That's why you get so many in the container.

Wait until it is almost dark and give your garden a good watering. The ladybugs are going to need a lot to drink once they get active. Then, just as it is getting dark, release your ladybugs. I tend to sprinkle them all over my garden so that I have good coverage. Ladybugs do not like to fly in the dark, which means they will stay in your garden. The longer you can get them to stay at the beginning, the more likely you are to keep some of them around.

When I came out the next morning, there were ladybugs everywhere. They were chasing bugs, eating pollen, and mating. I can only hope this means I'll find ladybug eggs later.

I also bought a little plastic house they had for ladybugs at the store. I am interested to see if this helps keep them around as well.

2016-04-12-15.08.png 2016-04-12-15.12.png

2016-04-11-14.53.png   2016-04-11-14.56.png

Topic

Transplanting tomatoes

on Sun, 03/27/2016 - 22:48

So it's that time again - time to move the tomato plants from the little seedling cells into seedling pots. I'm especially careful when doing this since I only minimally thin the tomatoes - I only remove the ones that are significantly smaller than the rest. For any of the other cells, I very carefully separate each tomato plant and transplant them each separately into larger pots. It's rare that I lose one when I do that, but it happens occasionally. I still end up with way more plants doing this than if I were to only select one per cell. But it also means that I end up with a lot of tomatoes - about 7 trays worth this time.

The key is being very, very careful with the roots. Massage the ball of dirt and roots gently and then carefully separate each tomato by holding the plant and gently wiggling it away from the others. Then you can plant each one of them. You might break a few plants when doing this, but once you get the hang of it you'll end up with more plants than if you saved one per cell.

Growing tomatoes and peppers

on Wed, 03/23/2016 - 22:48

Tomatoes and peppers are hot weather plants. They really prefer it when the temperatures are warm. So that means if it's not warm where you're growing, it's going to take longer for them to germinate and grow. That means it is best to help them stay warm and their soil moist if you want them to do well.

These plants are some of the few that I do use the clear tray covers on when they are germinating. The lights above them help them to stay nice and warm inside the trays, which helps them to grow. But I've found that it is best if you do this with seedling trays that are not made of materials like peat or coconut, as those mold very quickly. I've never been successful with those kinds of pots under the clear covers. As long as they don't get over-watered, I've not had an issue with the traditional plastic seed cells and regular seedling soil. But if you're using other kinds of pots or material to grow the seeds in, you may run into issues.

2016-03-23-21.40.png   2016-03-23-21.41.png

Preparing for cold weather

on Sat, 03/19/2016 - 22:49

It happens to us all - you get nice weather for a while and you put your seedlings out. Then the worst news comes out - you're going to have a cold snap. How do you protect your plants?

There are a number of ways you can do this, including:

  • Bringing them indoors or under cover (like under a covered patio or carport)
  • Using a floating row cover
  • Using a portable greenhouse
  • Using hoops

So what should you choose? Below is some information on each option.

Topic

How-to: So where do I start?

on Fri, 03/11/2016 - 22:42

IMG_0361.pngA lot of people want to grow their own vegetables, fruit, and herbs, but don't know where to start. It's taken me several years, but I've gotten pretty good at it. I continue to improve and learn from others and will be even better once I'm in a house where I can plant in the ground and have more room to work.

For the purpose of my blog, I'm talking about fruits and veggies in the culinary sense, not biologically. So cucumbers, squash, greens, peppers, etc = veggies. Tomatoes and strawberries = fruit.

I grow plenty of vegetables and some herbs, but very little fruit. That's because most fruits seem to grow on bushes, vines, or trees, and I can't have any of those in my container garden. But once I get into a house and have land, I am looking forward to growing a lot more fruit. When it comes to herbs, I just grow the things I use often, like basil, rosemary, cilantro, and chives. I also grow some mint to help attract pollinators and such.

How-to: How do I know when to plant?

on Mon, 02/22/2016 - 22:43

Here are some great resources for finding out when to plant things in Oregon. If you live in another state, do a Google search, as there are likely similar resources available for your state. For here I just Googled this: oregon vegetable planting calendar

Oregon gardening calendar

Oregon vegetable planting calendar

Here's the calendar for where I live (Zone 8)

Planting-Zone-8.jpg

Topic

How-to: My setup

on Sun, 02/21/2016 - 22:44

Over the last few years, I've learned a lot about growing vegetable, herb, and flower starts indoors. The first few years I just put them under my dining room light and a lamp and wondered why they were so spindly and weak looking. Why they often times died. Then I realized that they must not be getting enough light.

We have a grow store nearby that sells lighting, plant food, light stands, trays, and more for growing plants indoors. A good amount of it is targeted to marijuana growing (which is legal in my state), but is also excellent for growing your seedlings indoors.
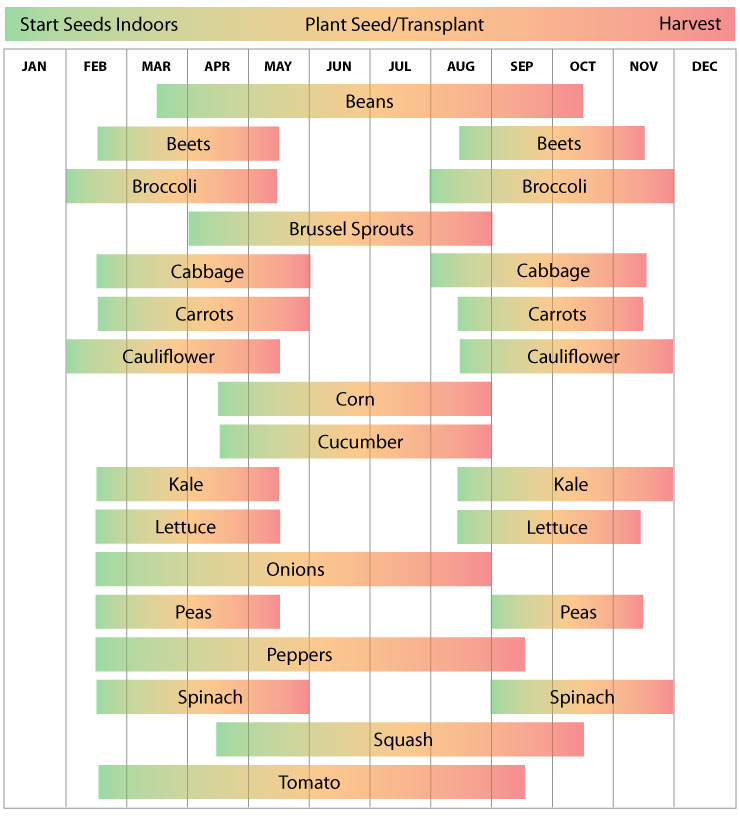
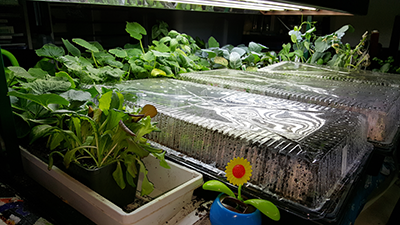
Lighting setup

2016-02-21-09.38.jpgI went in and talked to an employee and explained what I was doing. They sold me a Hydrofarm 4' light that has 6 tubes as well as a 4' Jump Start stand that can hold the light. This pretty much covers my entire dining room table, even when I have in the leaf. I absolutely love this light. It is amazing the difference between when I was just growing them under a lamp and when I got a real grow light. The plant grow stronger, bigger, and faster than under just a plain old light.

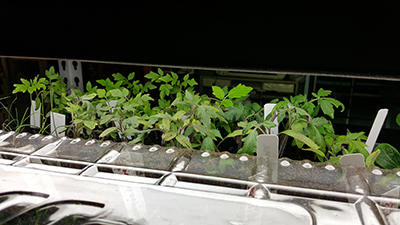
This will be the third growing season that I've used the lamp and stand. They've served me well. And when we had an issue with some of the connectors breaking on the stand, Jump Start sent me new ones at no charge. Excellent company and I love their products. Thus far I have not had to replace any of the bulbs and I have my light on about 12 hours a day for a few months. I haven't noticed much of an increase in our electricity from them, either.

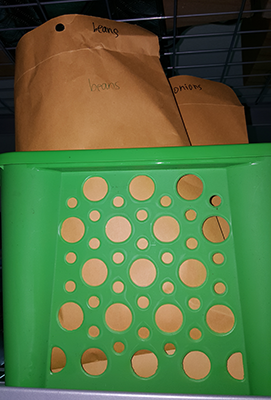
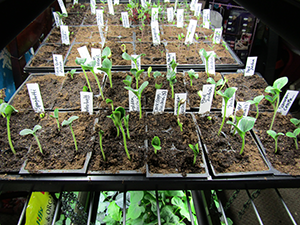
This year I decided to increase the amount of seedlings I can grow at a time, so I purchased a heavy duty shelf at Home Depot, some chains and s-biners to hang the lights, and some more 4' grow lights. I originally planned to do one light per shelf for 3 of the shelves, so I bought three lights. But after hanging them, I realized that I wasn't getting quite as much light as I might like when the lights were down low, so I decided two lights per shelf might be best. So I went ahead and set it up that way. I currently have two shelves covered and will be purchasing two more sets to do a third shelf. The other two shelves are being used for storage, such as seeding soil, trays, tray lids, and pots.